Over the years, I have learned that there are infinite ways in which pastels can be manipulated as a drawing and painting medium. Examples range from various mark making styles, using it in dry or liquefied form, employing a mixed medium approach, to countless varieties of blending, erasing, molding, shaping, stamping, scraping, scratching, and dusting techniques.
With my passion for pushing the medium, I enthusiastically approach each new experience to see what surprises might develop. Many of these surprises I, figuratively, tuck into my toolbox for future endeavors, waiting for that perfect match between subject matter and painting technique.
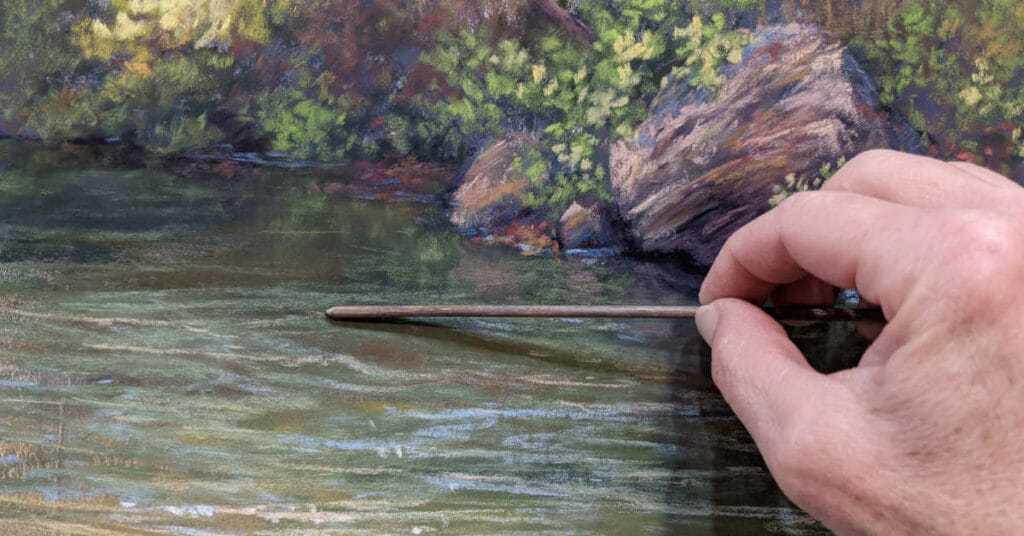
But one tool has turned into my best friend when working with pastels. And surprisingly, it is a kitchen tool. The humble wooden skewer. This inexpensive little reed of wood ultimately gets used in nearly every one of my paintings, but in many different ways.

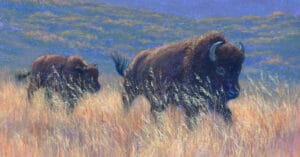
If I need to blend to make an element recede, such as distant water, I will use the skewer rather than using a brush (which may remove pastel) or a finger (which may over blend and muddy the colors). Gently moving the skewer in the direction of the pastel marks softly blends the colors in a more controlled manner. Similarly, if I want to create a soft transition from one color to another, such as in the fur of an animal, the skewer will drag one color into another, softening overly distinct marks.
The skewer manipulates edges well, softening the edge of an apple as it recedes, or sharpening an edge by pushing back the background. It can be used to thin down lines, such as electrical lines, animal whiskers or lettering. And it is handy for cleaning up an edge when pastel has ended up where you did not really intend.

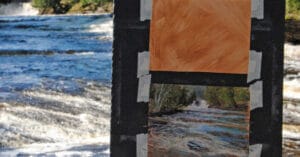
In “Architectural Artistry” my trusty skewer was used to clean up some errant marks. But I also used it to carve through layers of pastel to reveal earlier layers of pastel and underpainting colors.

They are easily cleaned by wiping them with a wet paper towel and if it needs to be resharpened, an emery board or sandpaper does the trick.
Inevitably, when one of my students has a question about how to fix something in their painting, one of the most frequently asked question is “Do you have your skewer?”
Take a look at Tracey’s tutorials for further learning…


10 comments
Judy Gibbs
Tracy that is really good to know about using a wooden skewer I shall give it a go on my next animal pastel drawing.
Tracey Maras
Thanks Judy. I’ve found that the skewer works exceptionally when to carve into fur to create the negative spaces of the shadows. I hold the tip of the skewer at about a 45 degree angle as I carve in and move pastel around.
Pamela Lang
Thanks Tracey,
I use the stick on my rose painting. What a difference. I will look at your website.
Tracey Maras
Thanks Pamela. I’m always experimenting with non-traditional uses for items. The wooden skewer has been the most versatile by far, so far.
Melanie
Thank you Tracey, that was interesting, particularly its use for carving through layers.
I call my thin willow charcoal my trusty charcoal stick (used for my initial sketch) so I can relate to the term of endearment.
Tracey Maras
Thank you Melanie. I’m also finding more and more uses using willow vine charcoal.
Mrs Jillian Hookham-Bassett
As always your blogs are invaluable ,this one was particularly useful
Thank you Tracey Maras
Tracey Maras
Thank you Jillian. I’m very pleased you find the blogs helpful.
Susan
Great tip! I have wooden skewers and will try this.
Tracey Maras
Susan – I tend to use the thin skewers but I’ve used the thicker ones also. Since they tend to be straighter, they also with really well when I need to check angles and perspective