Not a very snazzy title but I hope it will be helpful. I have always framed my own pastel artworks, primarily to keep the costs down and whilst it’s time consuming, when you pull it off, it’s very satisfying. Here’s a little look at the method I use.
Framing original artwork is an essential step to protect it and showcase your art in the best possible way. When you’ve invested your time and materials into a piece, we all want to enjoy it for years to come, or when you sell it, know you’ve done a professional framing job. Whether it’s a pastel painting, a delicate drawing, or a bold print, a thoughtfully mounted and framed piece can transform your art into a real statement piece.
One method to consider is a gutter mount, which adds depth and sophistication to your display. In this blog, I’ll take you through my process of mounting and framing my original pastel artworks, including how to create a gutter mount. Like lots of fellow soft pastel artists, I don’t use fixative, so a gutter mount is vital to help prevent the bottom edge of your mount getting marked by specks of pastel dust over time.
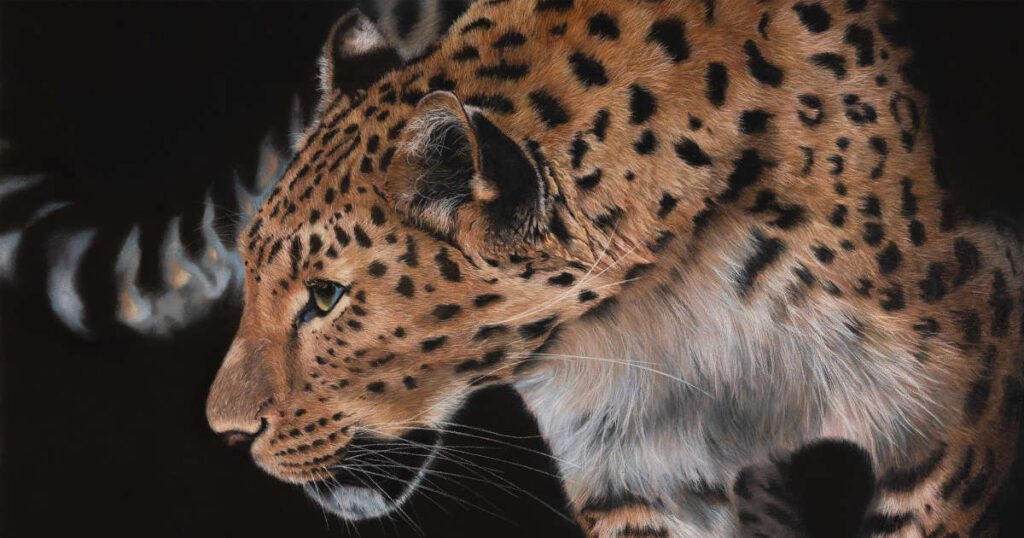
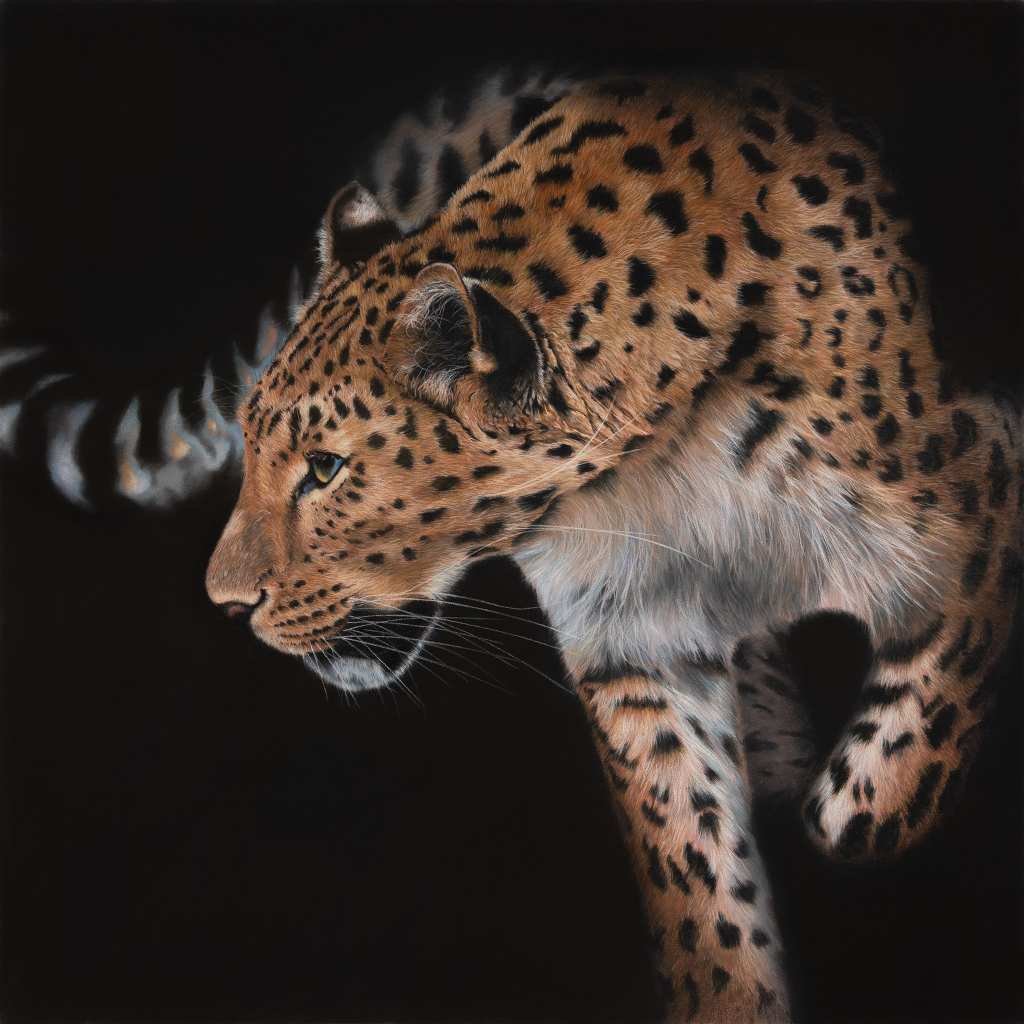
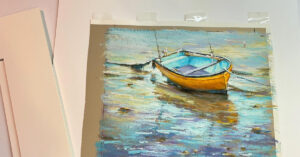
Here’s my original artwork of an Amur Leopard which I’ve titled Phantom. I’m getting it ready for an art fair I’m doing very soon. The reference image I used is by a great photographer called Gary Cox and I’m very happy to have been able to use it as I just love the image.
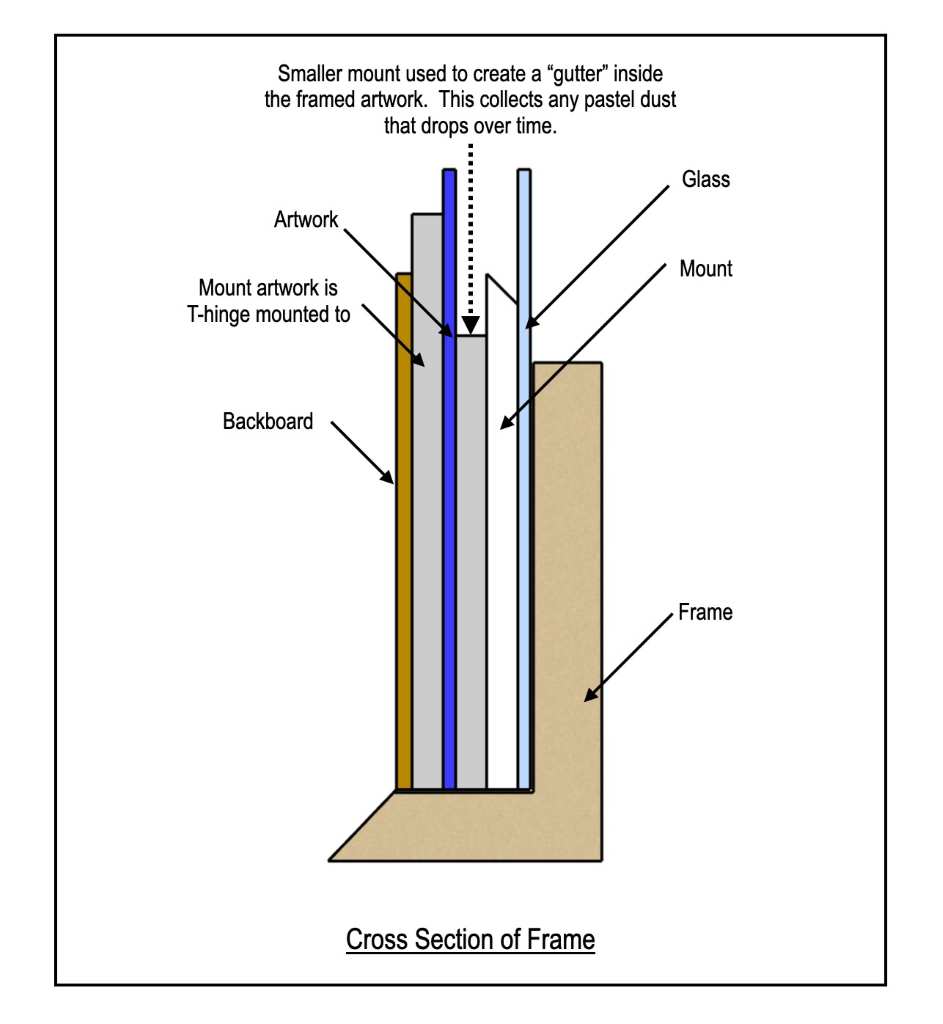
If you’re unsure what a gutter mount is, here’s a cross-section diagram to explain how they work.
1. Why Mounting and Framing Matters
It serves two key purposes: protection and presentation. The right materials shield your artwork from environmental damage, such as dust, light, and humidity, while a beautiful frame enhances its visual impact and integrates it into your or your client’s space.
2. What You’ll Need
- Acid-free mounting board
- Acid-free mat board
- Archival tape
- A frame of your choice
- Glass or anti-static acrylic glazing
- A ruler, craft knife, and pencil
- Acid-free mount board for creating a gutter mount
3. Choosing the Right Mounting Style
There are various mounting styles, but gutter mounting is a great option for enhancing your soft pastel artwork. A gutter mount creates a gap between the artwork and the mat opening, adding depth and emphasizing the piece without overwhelming it. It also provides a space or gutter for any pastel dust to fall into. This means your visual mount edge will stay nice and clean.
4. How to Create a Gutter Mount
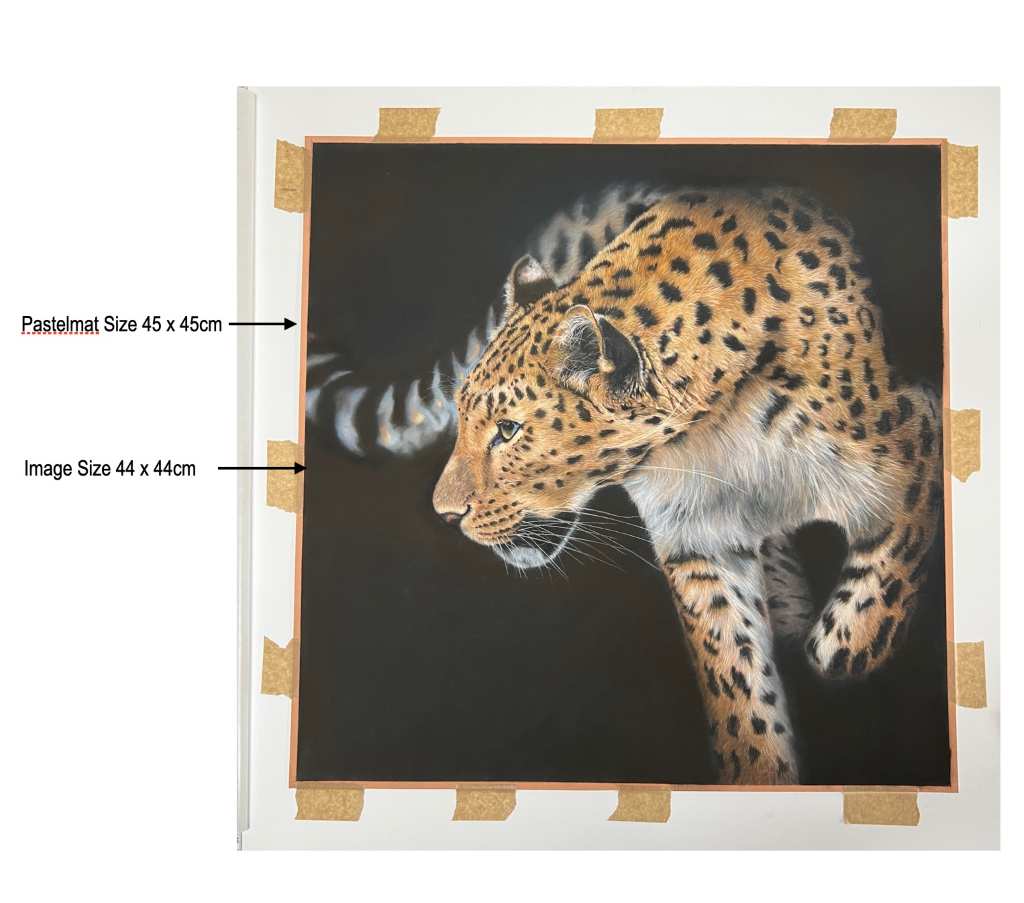
Step 1: Measure
I measure both the size of the Pastelmat paper I’ve used, in this example it’s 45 x 45cm, and the actual image size, which is 44 x 44cm. I want my gutter mount to have the same aperture size as the image so 44 x 44cm. The top mount I’ll be adding has an aperture of 43 x 43cm so the gutter mount will not be visible once it’s all mounted and framed.
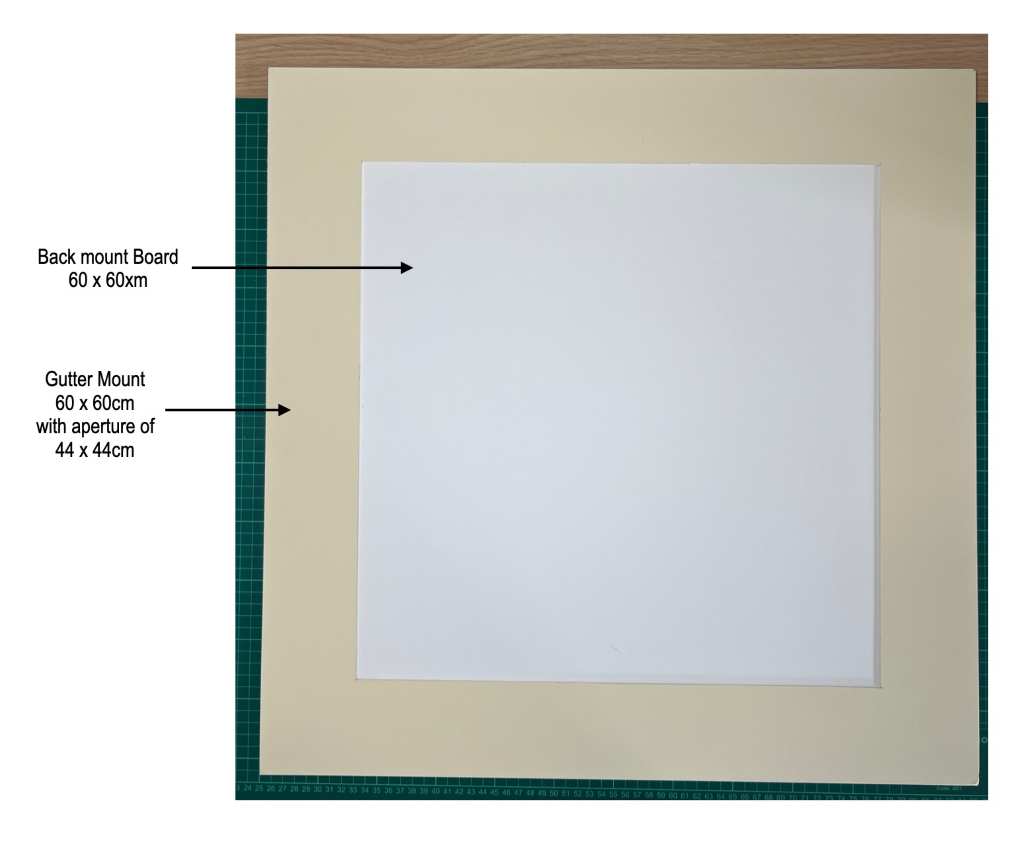
Step 2: Prepare the Materials
Cut an acid-free mounting board to match the size of your frame. In this example my frame is 60 x 60cm. This board will serve as the backing for the artwork to be T-hinge mounted to. Then cut a second mat board (gutter mount) with the same overall dimensions (60 x 60cm) before cutting an aperture in this which matches the image size of the artwork (44 x 44cm). This gutter mount creates the recessed effect and helps prevent damage from any loose soft pastel dust.
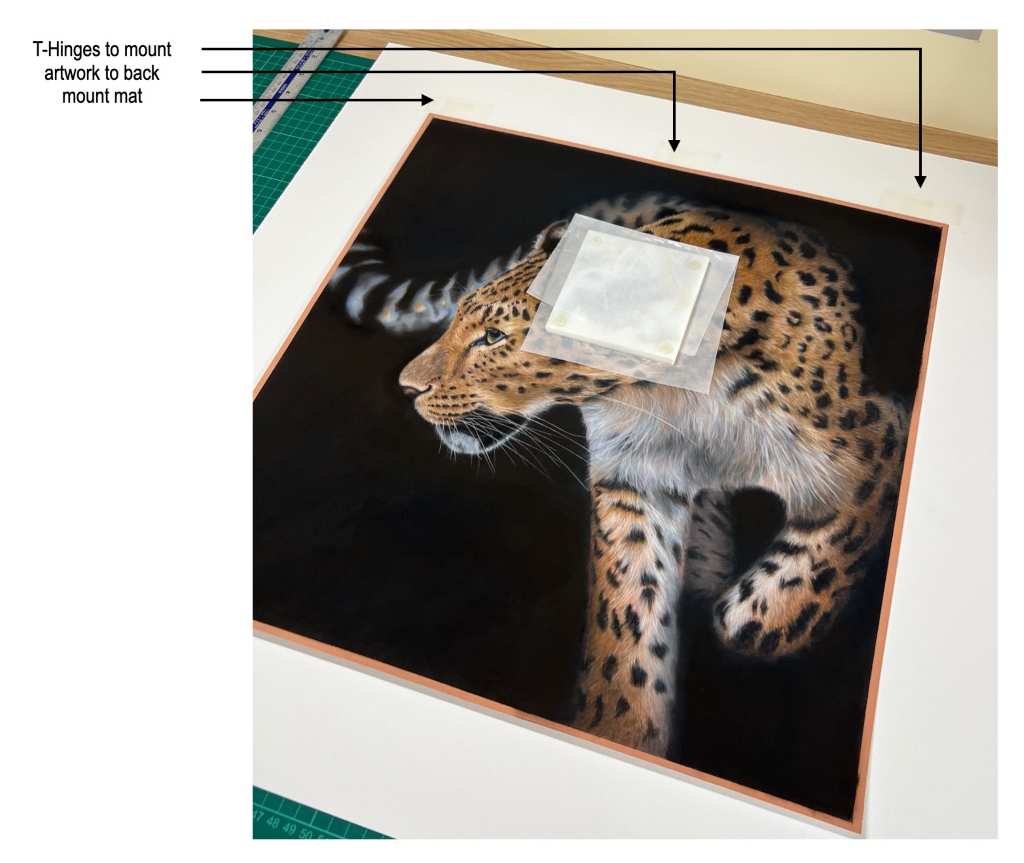
Step 3: Position the Artwork
I then mount my artwork onto the back mount mat, carefully ensuring it will be centred in the gutter mount window. Using archival tape I use the T-hinge mounting method to secure the artwork, along the top edge only, to the back mount mat. This method allows the artwork to respond to the environment it’s hung in and prevents buckling.
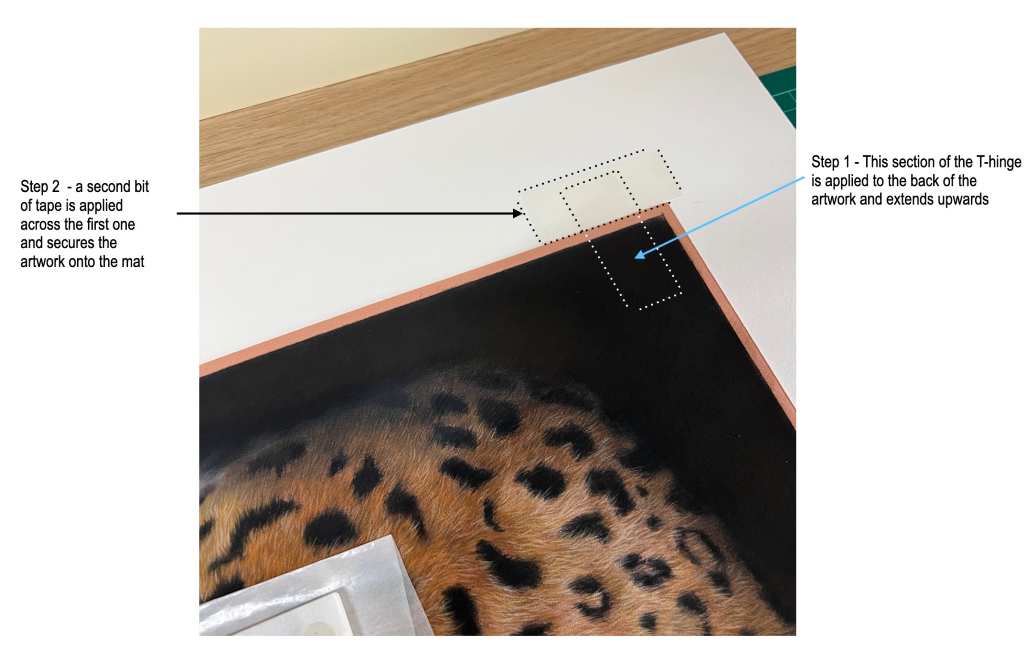
Here’s a close-up of a T-hinge.
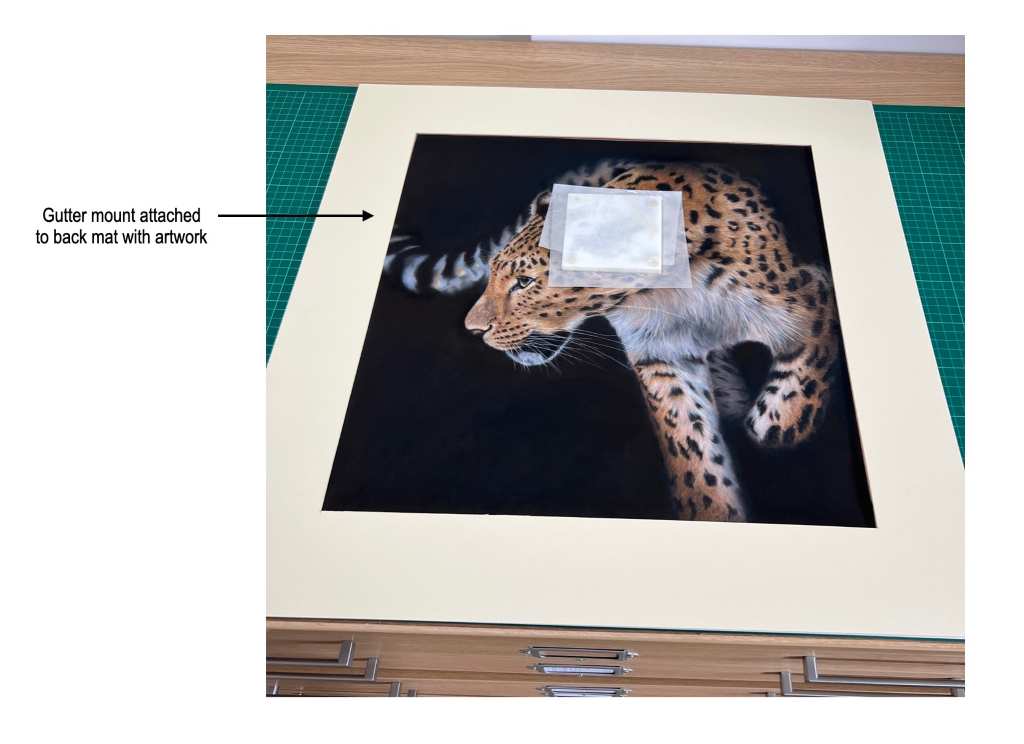
Step 4: Attach Gutter Mount
Using the archival tape, I then attach the gutter mount to the back mat.
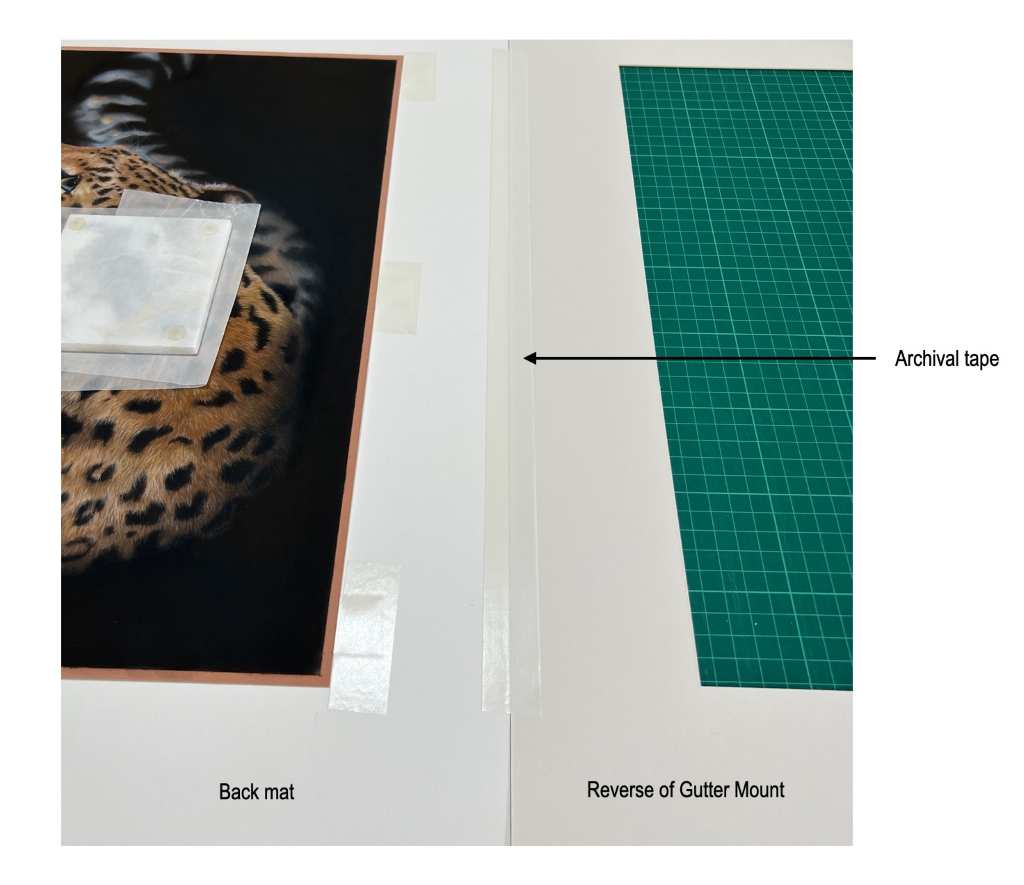
Once the above step is completed, my artwork looks like this.
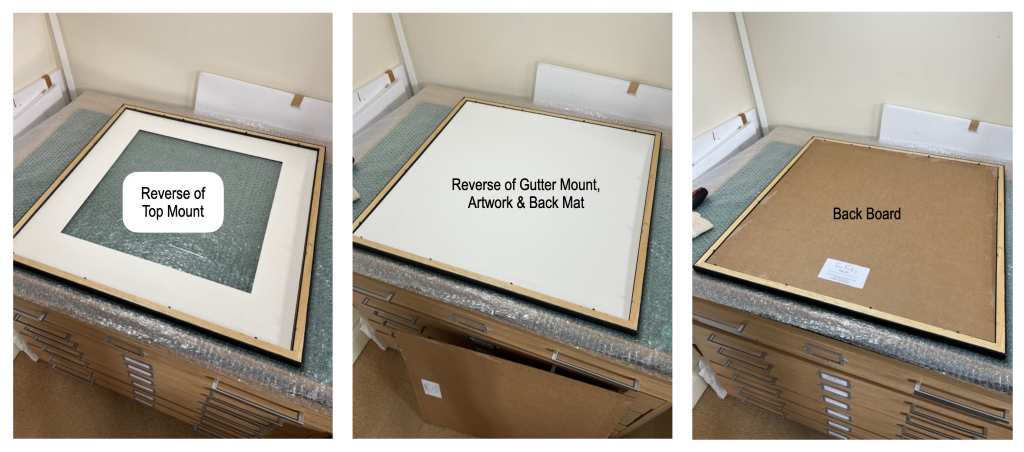
Step 5: Assemble the Frame
Once the artwork is secured with the gutter mount attached, I place my top mount into my frame, together with the gutter mount, artwork and back mat. Lastly, I add the backing board and secure the frame with the metal tabs.
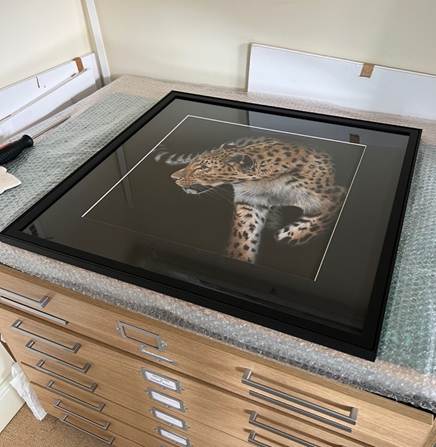
Step 6: Final Touches
I then clean the glazing to remove any dust or fingerprints. I always use a soft lint free cloth and a non-abrasive glass cleaner. Finally, I attach the hanging hardware, and the artwork is ready to display!
I hope my method is helpful and for any artists thinking about giving framing a go, this will encourage you. After you’ve spent hours working on a beautiful pastel painting – doesn’t it deserve top quality framing.
Happy Framing.


1 comment
Leone Madden
Thank you so much for this information .. i really appreciate it 🙏